

What Are Makeup Brushes Actually For? A Beginner's Guide

What Are the Different Types of Makeup Brushes?
The makeup brush world is full of jargons, such as stippling, kabuki, fan, buffing. It can feel like you need a glossary just to shop. But most everyday routines come down to seven core brush types, and understanding the purpose of each one takes the guesswork out of every application.
Face Brushes
Face brushes do the heavy lifting. A powder or setting brush is large and fluffy. It's built to sweep product lightly across a wide surface area without disrupting what's underneath. A foundation brush is denser. It's meant to press and blend product into the skin, whether you're working with a liquid, serum formula, or a light cream.
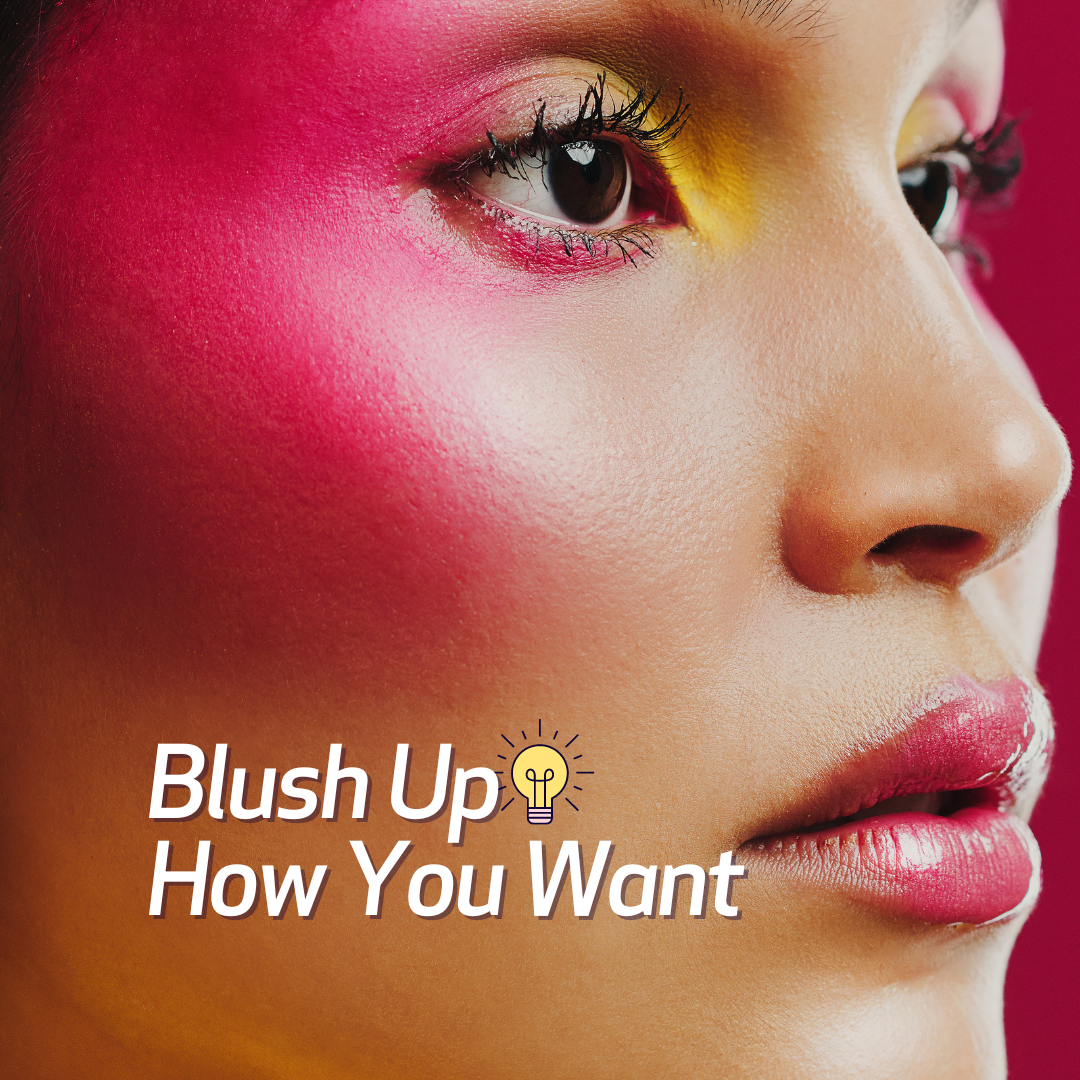
The contour and blush brush sits somewhere in between. Angled brushes deposit colour precisely along the hollows of the cheek; rounded ones give a softer, more diffused finish that reads as natural flush rather than sculpted stripe.
Eye Brushes
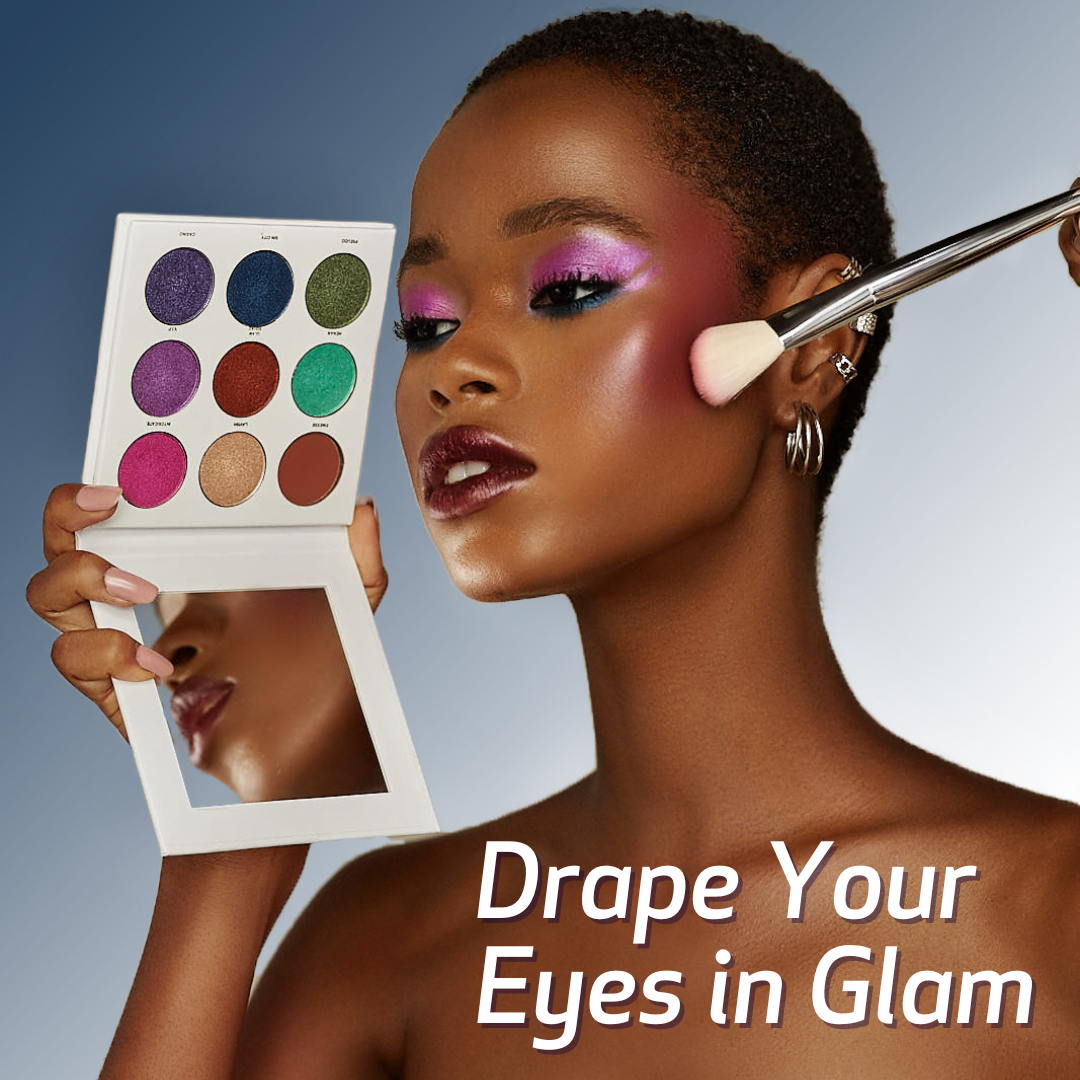
Two brushes cover most eye looks: a flat shader and a fluffy blender. The shader packs pigment onto the lid, while the blender diffuses the edges. Most blending mistakes happen when people skip the blender and try to make the shader do both jobs. They're different shapes for a reason.
A fine liner brush handles detail work like winged liner, tightlining and smudging along the lash line. It's small, firm, and precise in a way that your ring finger cannot replicate.
Lip Brush
This one gets dismissed more than any other. But applying lip colour with a brush, even just a cream lipstick, gives you a cleaner edge, better product placement, and more staying power. The pressure and control are simply different.
How Do You Actually Use Each Brush? A Step-by-Step Routine:
Knowing the brush name is one thing. Knowing the motion, the pressure, the direction, the technique that makes it work, is another. Here's how a straightforward base-to-finish routine looks when you apply each tool correctly:
1. Apply foundation. Use your foundation brush in small, circular buffing motions starting at the center of the face and working outward. Keep pressure light at the edges and near the hairline.
2. Set with powder. Load your powder brush, tap off the excess and press, don't sweep, the brush against your T-zone first. Then dust lightly across the rest of the face. Sweeping drags product; pressing sets it.
3. Add blush or bronzer. Smile slightly to find the apples of your cheeks. Then sweep your contour brush upward toward the temples using a 'C' shape. For bronzer, work along the perimeter of the face where the sun would naturally hit.
4. Build the eye look. Tap your shader brush into your shadow and press it onto the lid; lighthly press the product, don't drag. Then switch to your blending brush and use windshield-wiper motions above the crease to soften any hard lines.
5. Define with liner. Dip your liner brush into a cream liner or wet shadow and draw small, connected strokes along the lash line rather than one long drag. Shorter strokes give you more control.
6. Finish the lips. Use your lip brush to apply product from the center outward, then trace the outline for a clean edge. This step alone extends how long the colour lasts.

Do I Really Need Separate Lipstick and Liner?
Not always and this is exactly the kind of beauty assumption worth questioning. Traditional advice says liner first, then lipstick. But a lip brush used with a creamy lipstick can define the edge, control the shape, and layer the pigment in a way that makes a separate liner redundant for most everyday looks.
The exception is when you want extreme precision. A sharp cupid's bow, a bold contrast between liner and fill, or when you're using a very pigmented lip product on a larger surface. In those cases, a liner pencil and a brush used together make sense. For a commute-ready, five-minute face? One creamy formula and one lip brush is enough.
More products do not always mean a more polished result. That's the premise we built LOOLA Cosmetics around. Every product in our line exists because it does what two or three others used to do.

What Brushes Do Beginners Actually Need?
Stop. Before you go looking at 24-piece sets, consider that most professional makeup artists reach for the same five or six brushes across 90% of their work. Beginners do not need more tools. They need better clarity on the tools they already have.
A starting kit should cover: one large powder brush, one foundation brush, one cheek brush that works for both blush and contour, one flat shader for eyes, one blending brush, and one detail brush that handles liner, brow work, and lips. Six brushes. That's a complete face.
The Silver Makeup Brush Set from LOOLA Cosmetics was built around exactly this thinking. Instead of filling a roll with specialty tools you'll use twice, we curated brushes that each serve multiple functions. So you reach for fewer things but use each one more intentionally. It's the kind of kit that travels well, stores cleanly, and doesn't make you feel like you need a tutorial just to get dressed in the morning.

How Do You Clean Makeup Brushes Without Ruining Them?
Weekly cleaning is the standard advice. Daily spot-cleaning with a brush cleanser or clean cloth keeps things manageable between washes.
For a full wash: wet the bristles pointing downward (never let water get into the ferrule — that's the metal collar connecting bristles to handle), work a small amount of gentle cleanser through the bristles with your fingers or a textured cleaning mat, rinse downward, reshape the bristle head, and lay flat to dry. Standing them upright while wet lets water seep into the ferrule and loosens the glue over time.
One note: cheap brushes that shed bristles or lose their shape after a few washes aren't saving you money. They create inconsistent results and get replaced frequently. Investing in a set with quality construction means the maintenance effort actually pays off.
Before and After: Routine With vs. Without the Right Brushes
|
Without the right brushes |
With a curated brush set |
|
Foundation applied with fingers produces results that are uneven and oxidise faster. |
Foundation buffed in blends seamlessly and stays longer. |
|
Powder swept too heavily creates flashback and a cakey finish. |
Powder pressed in is natural-looking, with no fallout. |
|
Eye shadow blended with fingertip can sometimes look muddy and have rough edges |
Eye shadow blended with proper brush creates a clean, diffused gradient. |
|
Lip colour applied directly from bullet causes feathering at edges. |
Lip colour applied with brush is precise, and lasts through a meal. |
Build Your Travel Beauty Kit
If this guide has you looking at your current brush collection differently, that's the point. You probably don't need more, you need better. A tighter kit with brushes that each earn their place.
The LOOLA Cosmetics Silver Makeup Brush Set is the edit we'd make for anyone starting out or streamlining down. It fits in a makeup bag that actually closes. It covers every step in the routine above. And because it's built for travel, the quality holds up to the kind of use that exposes cheap brushes fast.
Your next step isn't adding to the collection. It's clearing it out and starting with what actually works.
|
Build Your Travel Beauty Kit The LOOLA Cosmetics Silver Makeup Brush Set is designed for exactly this moment, when you're ready to edit your routine down to what actually works. Shop the Silver Makeup Brush Set → loolacosmetics.com |
Comments